How to create realistic hair for 3D hair printing
Introduction
3D printing is a very interesting topic for every startup and company, both for the creation of proof of concept, both for very specific unusual parts, such as 3d hair printing.
In our company, we use the 3D printer several times to print the most varied things: we create and print custom cases for boards, joints for robotic parts, humanoid robot parts, gadgets, etc … For example, take a look at our article about an IoT application with a custom case: https://www.makarenalabs.com/nebul-iot-a-simple-embedded-smart-device-for-greenhouse/
We also use different materials for different purposes, for example:
- PETG for strong large models;
- TPU for soft models;
- UV resin for small, extremely precise, and detailed models.
For each model, there is the right material.
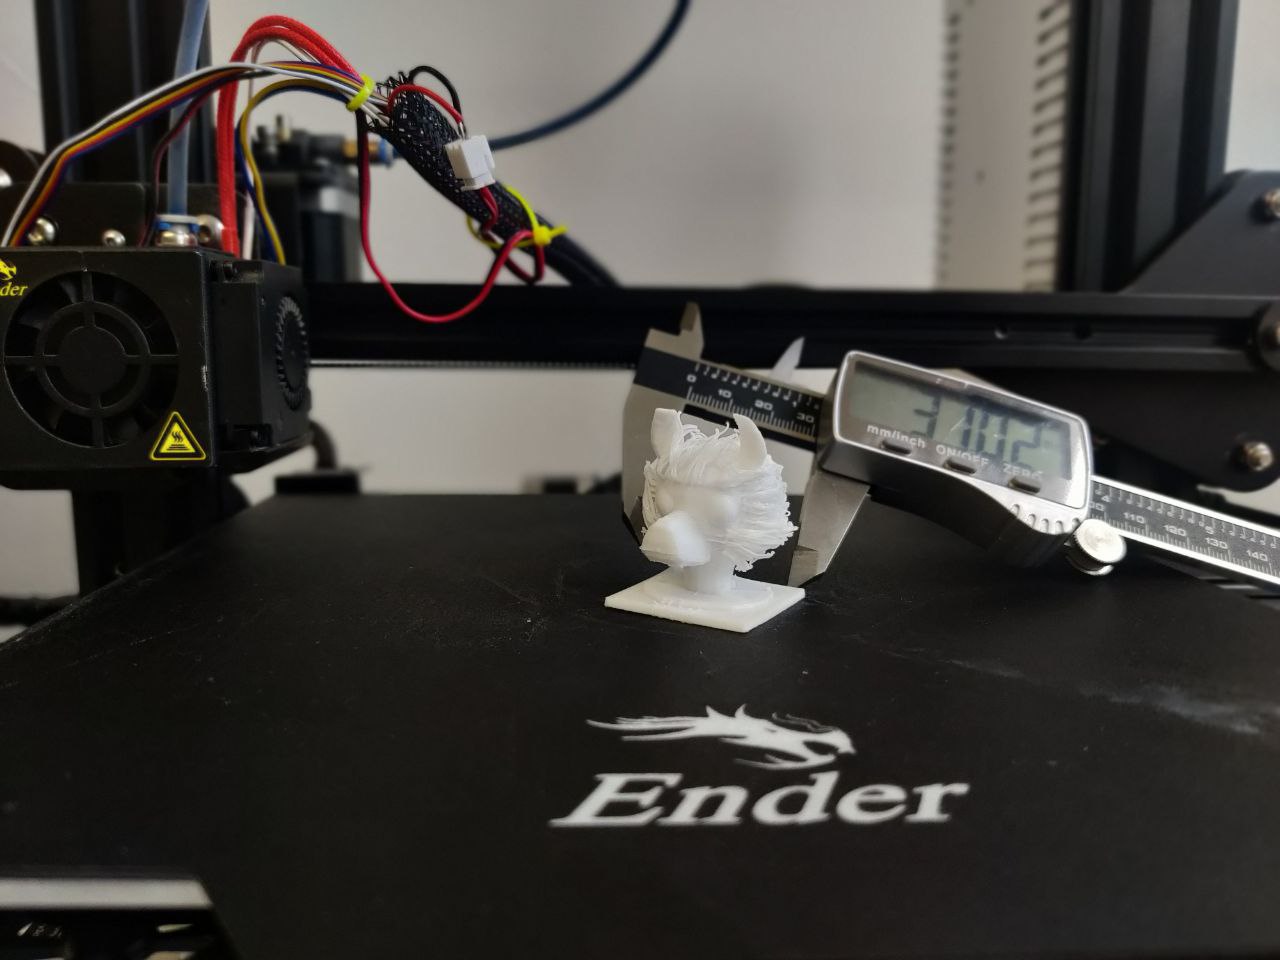
We were looking for new printing techniques when we had discover 3D printed models of animals or people with realistic hairs or fur. So, we decided to replicate this type of model and, not finding any tutorial about it, we decided to do it ourselves.
Mesh creation for 3d printing
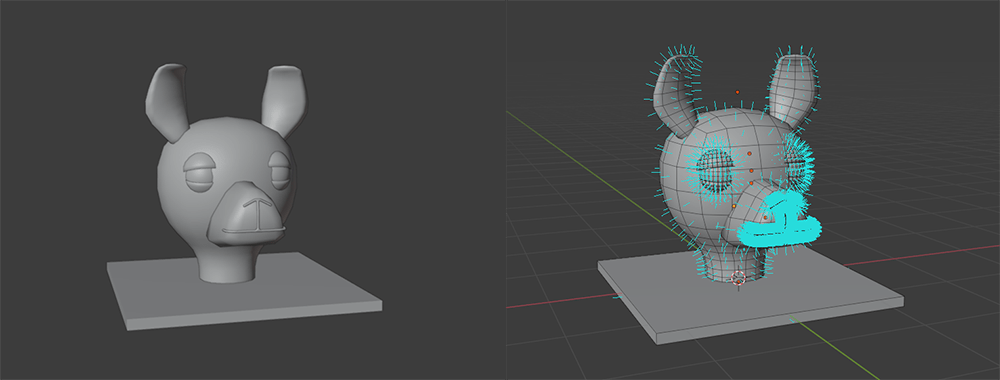
First of all, we need a head or a part of the body to create hair. For the majority of the projects, we use Blender.
The starting mesh must be manifold, with correct normals, avoiding faces without thickness, otherwise, it is impossible or very difficult to print it.
I do not recommend using a particle system and converting it into a mesh (it is extremely heavy) for the construction of the entire mesh.
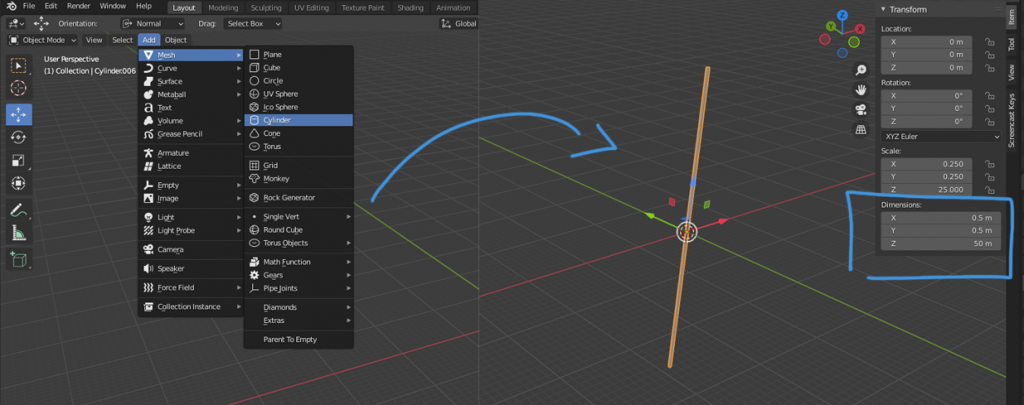
The starting point to create a solid object that represents hair could be a cylinder, a cube extruded in a single axis, or a similar mesh. To speed up your work you can use a single “hair” mesh to create two hair. Each hair is crafted individually.
A few points of the procedure before we begin talking about the starting mesh (the head to be clear):
– first, the mesh, as I said before, must be manifold
– then, the mesh must need a few supports to be print
– then, the mesh mustn’t have graphic obstacles around the affected area, like ears too massive, hollows or concave areas, etc…
– finally, the base on which rests must be stable.
The hair creation
Let’s begin from the first single hair:
– I recommend you to use, for the mesh, a cylinder shape or parallelepiped shape
– the mesh length will be what you want, but remember that once settled the hair length, it could cover some detail about the head mesh.
– I recommend you a mesh thick about 0.5 millimeters but it depends on how much your printer is able to create thin objects.
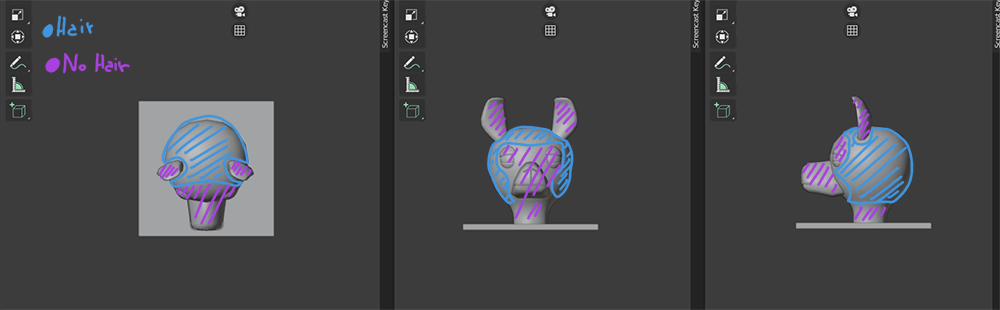
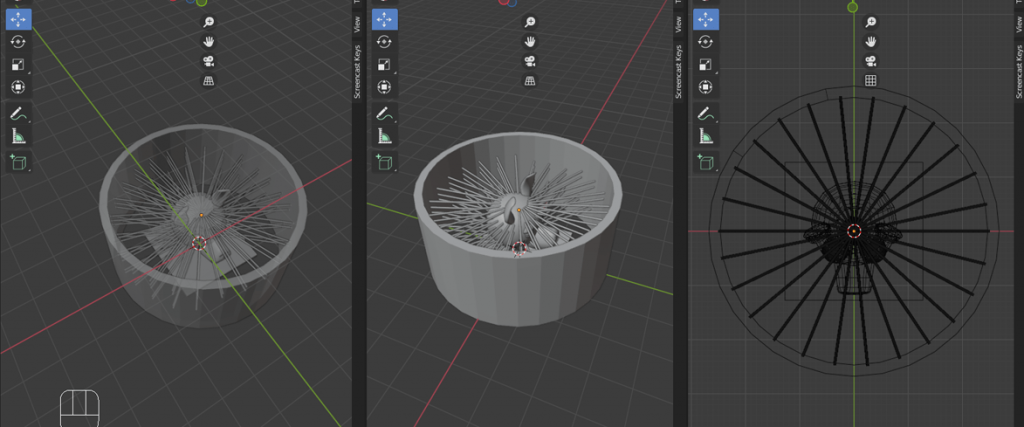
For a full head of hair, we use the “spin tool” in edit mode. For example, in our demo model, we have rotated the model in a way that will be horizontal, and in the spin tool settings, we used a dozen steps in the Z axis.
You have to duplicate the hair mesh enough to cover the head.
After that, you have to delete the parts of the mesh that cover the details of the head.
Remember: all of the hair mesh must be horizontal to the head because then we have to create the support for the hair.
in conclusion, you have to use unite all the hair with the head: add a boolean modifier and, with union option, connect the hair to the head.
Supports for 3d printing
we will create some supports that will hold up all of the hair mesh. It’s very easy: you must create a hollow cylinder with a thickness of roughly 2 – 3 millimeters that surrounds the entire structure and encompasses 1-1.5 millimeters of the end of hair mesh.
If you need to print your model with additional supports, you will, unfortunately, do it by hand with Blender.
in conclusion, you have to unite the cylinder with the other mesh.
Hairstyle
To finish your hair head and create a styling, you’ll need to do one of these options:
– A thermo-gun (best choice)
– An hairdryer (safer choice)
– Very hot water (we have never tried it)
Arm yourself with special thermal gloves (don’t do like the video) and an object similar to a hairbrush for combing the hair.
Now, melt slowly the hair (try to not melt the head), make some pauses, and comb continuously the hair to keep the shape.
If you want to use the hot water, put your object in a basin and pour the hot water over the head.
Let me know if you manage to do it!
Enjoy
