IoT with Nebul.IoT: an embedded device for greenhouse
Introduction
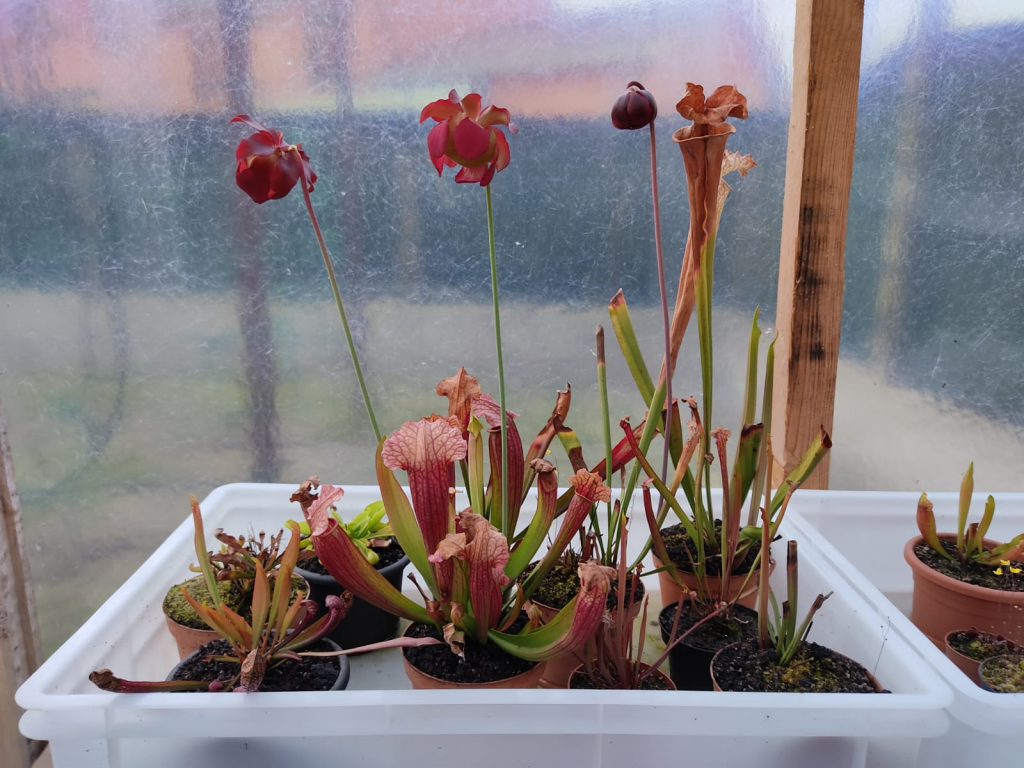
The role of precision farming in the actual agronomic plants is crucial for increasing productivity and improving control accuracy. In this article, we propose a smart device, Arduino based and open source, for controlling a little greenhouse of carnivorous plants, called Nebul.IoT, that manages temperature and humidity and, in critical situations, controls the internal nebulization system.
| Component | Quantity | Price |
|---|---|---|
| Arduino UNO | x1 | 19 € |
| DHT11 Sensor module | x1 | 5 € |
| Relay 5v Module | x1 | 2 € |
| Electrovalve | x1 | 14 € |
| Buzzer | x1 | 1 € |
| ESP32 PMOD | x1 | 30 € |
The problem
A greenhouse for the carnivorous plants is very difficult to be managed: while this kind of plants needs a specific ecosystem which is very different from ours (we are located in Italy, specifically in Veneto), we need to obtain the right temperature and humidity, which implies that a greenhouse need to be controlled in terms of internal temperature and humidity. This control can be done simply by vaporizing the water in order to increase the humidity internally and decrease the temperature.
The real problem is the following: how can I manage the ecosystem manually? How many farmers do I need in order to manage multiple greenhouses and how frequently do they need to control the greenhouses? According to that, we propose a simple and smart solution.
Embedded systems and IoT
This task of precision farming is not very complex, Therefore we can use a simple embedded system with IoT features, such as internet connection and internet communication protocol support. We decided to use Arduino UNO for the sensors control and ESP32 module for the communication management. The ESP32 is used as HTTP Client that communicates with a custom server through a normal router.
Arduino does not support natively the wireless protocol, so we decided to use a robust system like the ESP32, that can be controlled with AT command protocol natively; in this way, we simply open a Software Serial on the Arduino in order to communicate with the ESP32 module and also with the internet.
The entire process is the following:
- setup communication between Arduino UNO and ESP32 with AT Commands
- setup ESP32 in order to instaurate communication with a common domestic router
- for each minutes:
- check temperature and humidity
- send temperature and humidity to an API server
- if temperature is too high or humidity too low:
- activate alarm (in order to exit from the greenhouse)
- activate nebulizer
- wait for a minute
- continue
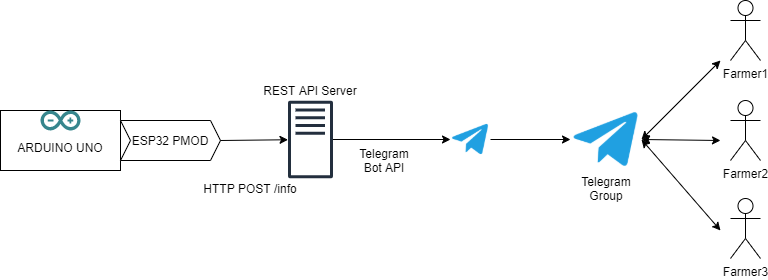
The cloud server simply redirects the message to a Telegram bot that writes into a chat, in order to control remotely the status of the greenhouse. The choice of Telegram bot is very efficient: due to the fact that Telegram exposes public API for the bot, we don’t need a custom mobile application, but simply we can use a common message application.
The high level infrastructure is the following:
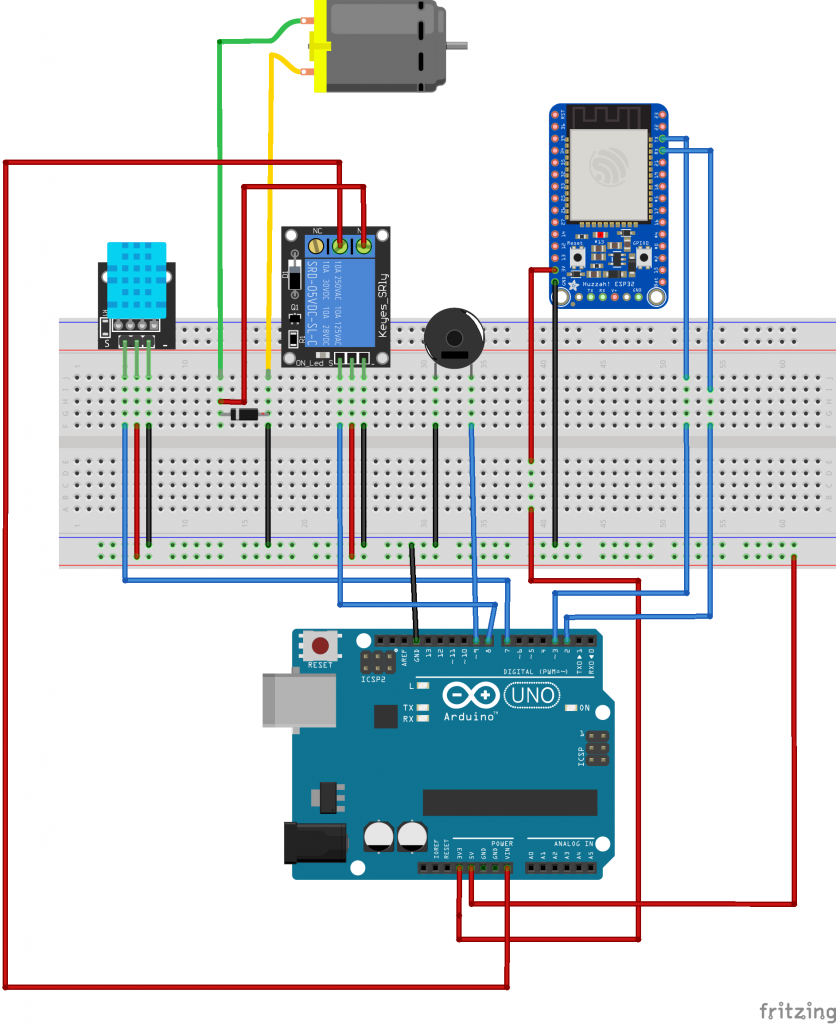
Arduino wiring
The wiring is quite easy: the DHT11, the Relay and the buzzer expose only 1 wire for the data communication/control, so we can use any Arduino GPIO; for the ESP32 we need to use a Software Serial, so we choose the 3 and 2 for Rx and Tx (because Software Serial is supported in these 2 pins).
The power supply are configured in the following way:
- the system input is driven by 9V by the Arduino power supply connector
- the DHT11 and Relay is driven by 5V obtained by Arduino pin
- the ESP32 is driven by 3.3V obtained by Arduino pin
- the Electrovalve is driven by VIn of Arduino that derived by the power supply of the Arduino itself (so it is 9V)
- in order to avoid kickback spike, you need to add a flyback diode (like IN4001 Diode)
Arduino code
The Arduino code is quite simple but takes care about the communication timing of the ESP32: if you notice, there is a lot of delay because Arduino needs to wait the internal configuration of ESP32. It can be substituted with regex applied to ESP32 output in order to understand the output, but for an Arduino this task is too complex.
#include <dht.h>
#include <SoftwareSerial.h>
dht DHT;
SoftwareSerial mySerial(3, 2);  //RX,TX
#define DHT11_PIN 7
const int valvePin = 8;
int valveState = LOW;
unsigned long previousMillis = 0;
const long interval = 1000;
const int buzzer = 9;
String _ret = "";
void serialFlush(){
while(mySerial.available() > 0) {
char t = mySerial.read();
}
}
String send_message(String s, int timeout = 2000, bool raw = false){
_ret = "";
char c = '\0';
long startTime = millis();
long counter = 0;
Serial.println(s);
if(!raw)
mySerial.print(s+ "\r\n");
else
mySerial.print(s);
while(!mySerial.available()){
counter = (millis() - startTime);
if(counter > timeout){
return "TIMEOUT";
}
}
do{
c = mySerial.read();
_ret += c;
}while(c != '\n');
return _ret;
}
String ret_esp32;
void setup() {
pinMode(buzzer, OUTPUT);
Serial.begin(19200);
//while (!Serial)   { ; }
mySerial.begin(19200);
char c = '\0';
delay(10000);
Serial.println("startup!!!");
serialFlush();
ret_esp32 = send_message("AT+RST");
Serial.println(ret_esp32);
Serial.println("***");
delay(1000);
// waiting for "ready" message
_ret = "";
while(!mySerial.available());
do{
c = mySerial.read();
_ret += c;
}while(_ret.indexOf("ready") != -1);
Serial.println("ready!!!");
delay(10000);
serialFlush();
ret_esp32 = send_message("AT");
Serial.println(ret_esp32);
delay(1000);
ret_esp32 = send_message("AT");
Serial.println(ret_esp32);
Serial.println("***");
delay(1000);
ret_esp32 = send_message("AT+CWMODE=1");
Serial.println(ret_esp32);
Serial.println("***");
delay(5000);
ret_esp32 = send_message("AT+CWJAP=\"\",\"\"", 5000);
Serial.println(ret_esp32);
Serial.println("***");
delay(20000);
}
void send_http_message(String get_msg){
ret_esp32 = send_message("AT+CIPSTART=\"TCP\",\"\",");
Serial.println(ret_esp32);
Serial.println("***");
delay(5000);
ret_esp32 = send_message("AT+CIPSEND="+String(get_msg.length()));
Serial.println(ret_esp32);
Serial.println("***");
delay(2000);
ret_esp32 = send_message(get_msg, 5000, true);
Serial.println(ret_esp32);
Serial.println("***");
delay(10000);
ret_esp32 = send_message("AT+CIPCLOSE");
Serial.println(ret_esp32);
Serial.println("***");
delay(1000);
}
void loop() {
int chk = DHT.read11(DHT11_PIN);
String get_msg = "GET /info?temp="+String(DHT.temperature)+"&hum="+String(DHT.humidity)+" HTTP/1.1\r\nHost: \r\n\r\n";
send_http_message(get_msg);
if(DHT.temperature > 30){
Serial.println("TEMPERATURE TOO HIGH!");
int i = 1000;
Serial.println("Count down");
while(i > 0){
tone(buzzer, 1000);
delay(i);
noTone(buzzer);
delay(i);
i -= 25;
}
Serial.println("Open Valve");
valveState = HIGH;
digitalWrite(valvePin, valveState);
delay(25000);
Serial.println("Close Valve");
valveState = LOW;
digitalWrite(valvePin, valveState);
}
delay(1000);
}
Server code
Also the server code is quite easy, because we decided to use NodeJS and Express framework for Rest API implementation. For the communication with Telegram, we write a simple script in bash that communicates with the Telegram bot via its token. The code is deployed on AWS EC2 machine (micro).
server.js:
const express = require('express')
const app = express()
const port = 4281
const bodyParser = require('body-parser');
const url = require('url');
const querystring = require('querystring');
app.use(bodyParser.urlencoded({ extended: false }));
app.use(bodyParser.json());
const { execSync } = require('child_process');
app.get('/', (req, res) => {
res.send('Hello World!')
})
app.get('/info', (req, res) => {
if(req.query.temp !== undefined && req.query.hum !== undefined){
var temp = req.query.temp;
var hum = req.query.hum;
console.log(temp, hum);
var strstr = "temperature: "+temp+", humidity: "+hum;
console.log("/home/thor/NEBULA_IOT/send_telegram.sh \""+strstr+"\"")
const stdout = execSync("<SCRIPT PATH>/send_telegram.sh \""+strstr+"\"")
  }
  res.end()
})

app.listen(port, () => {
  console.log(`Example app listening at http://localhost:${port}`)
})
Case printing
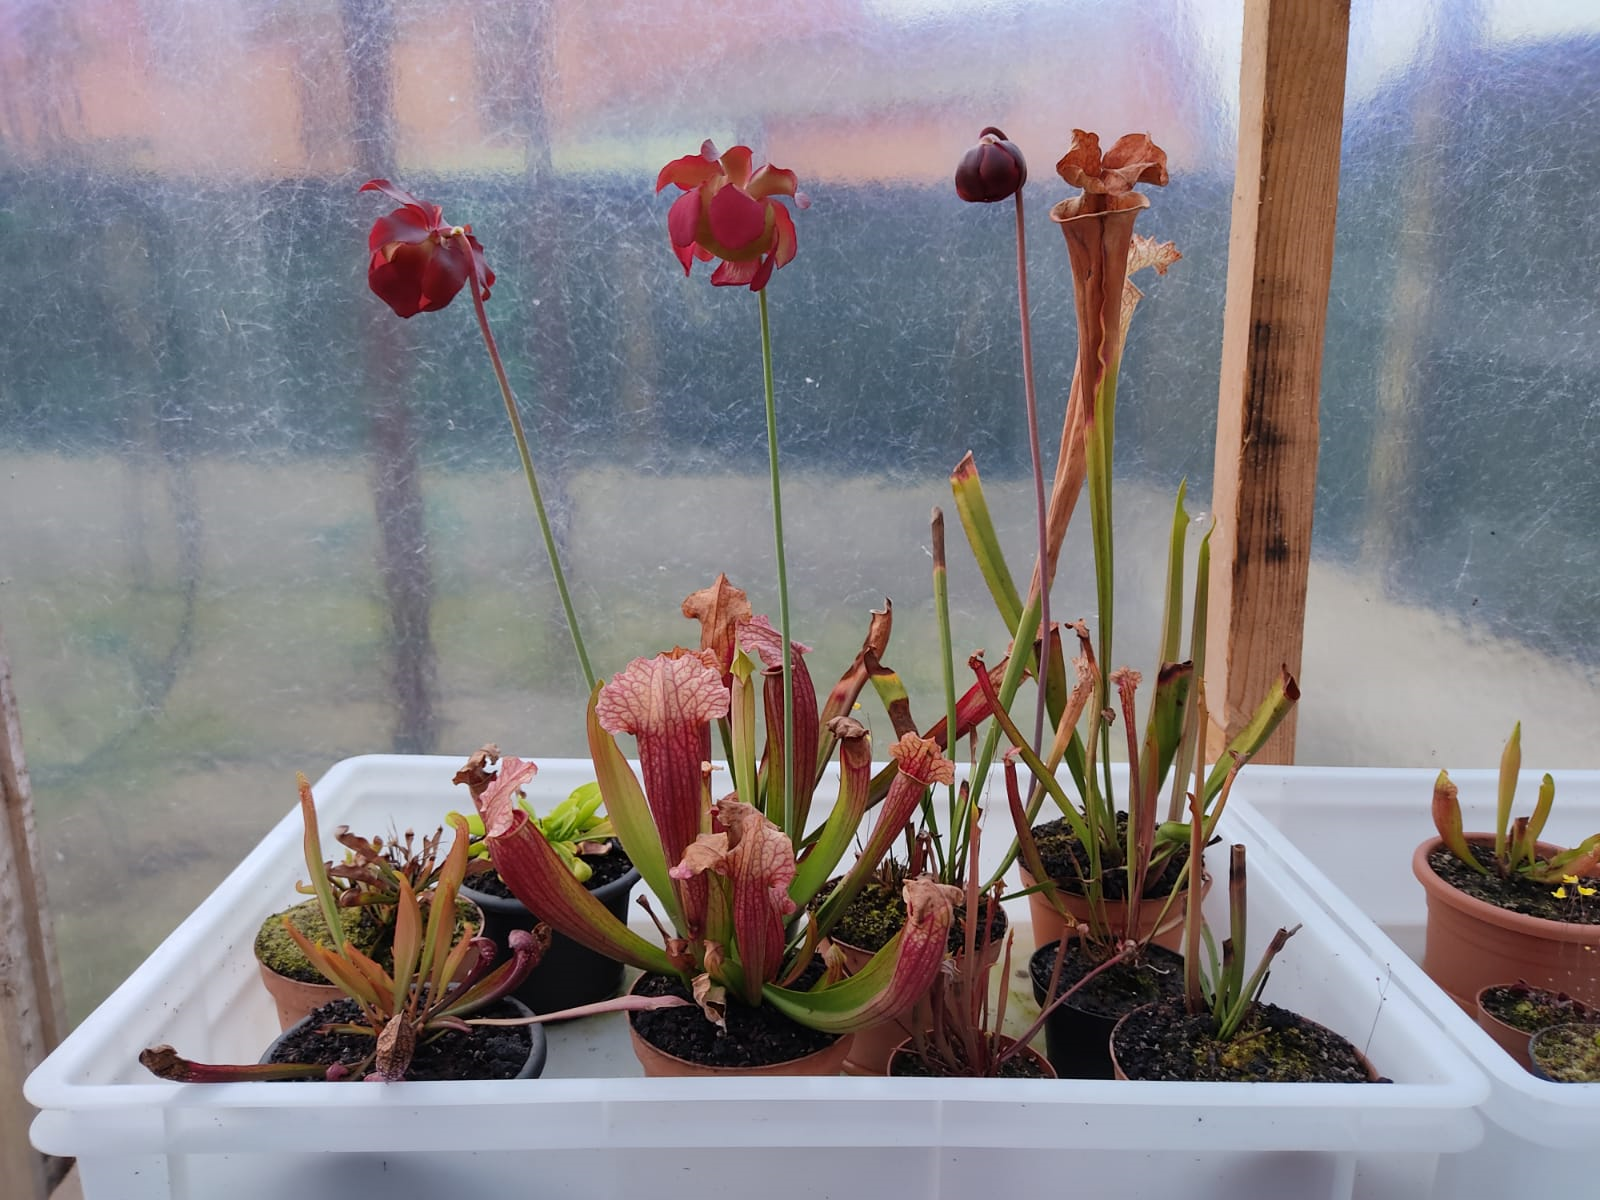
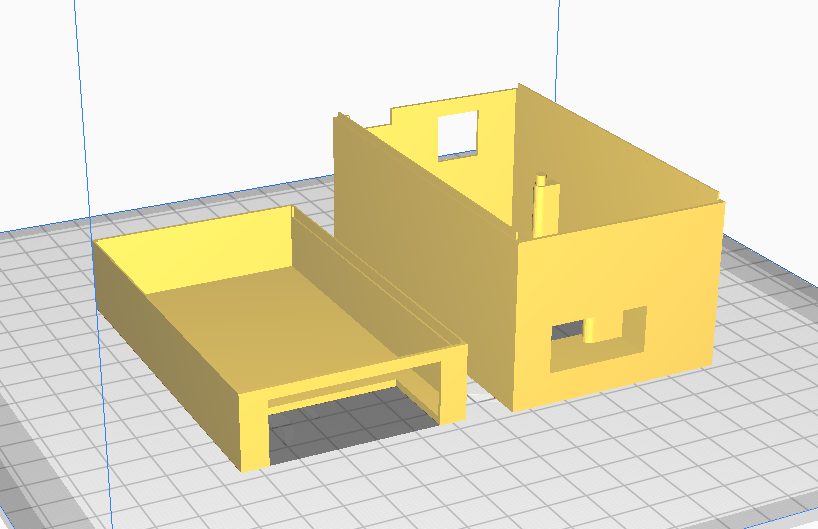
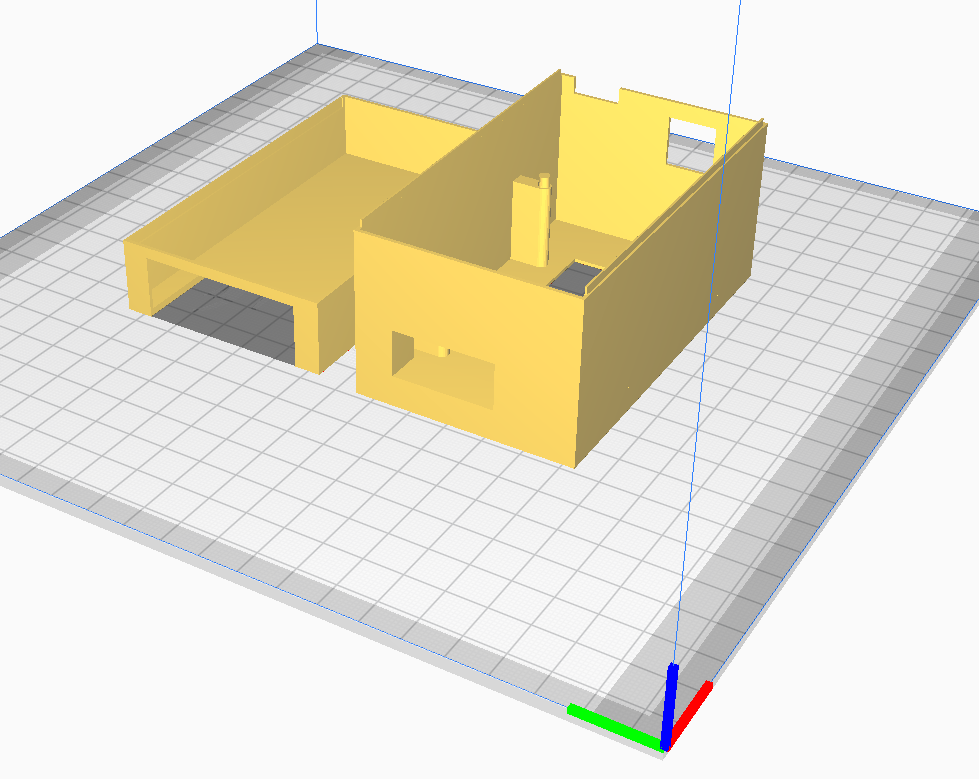
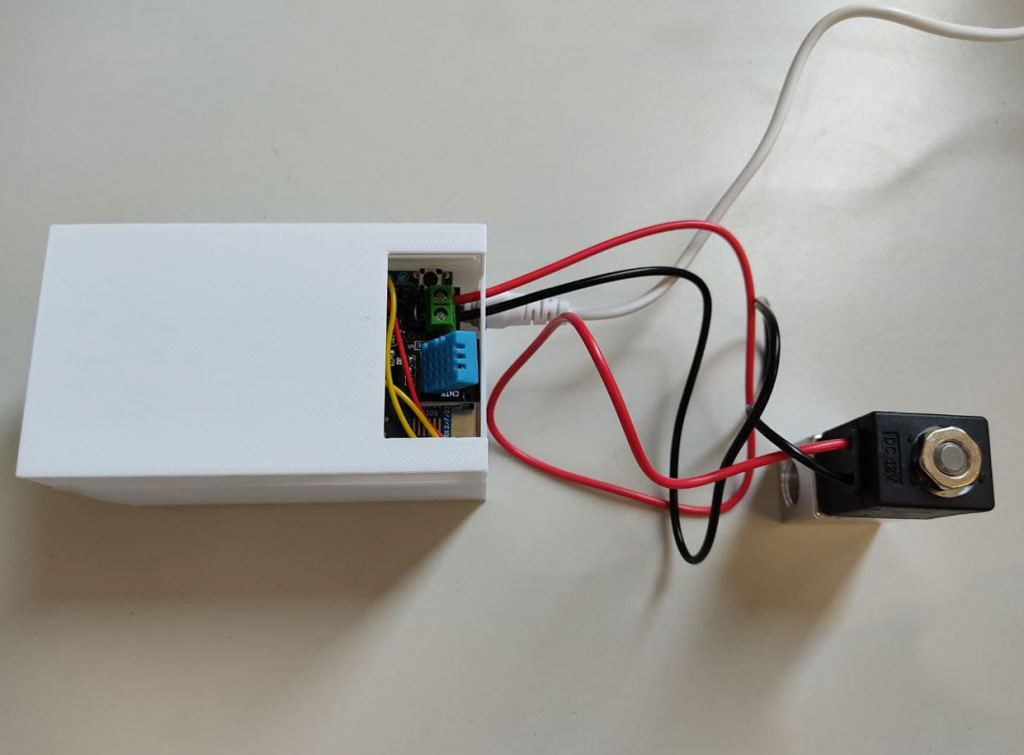
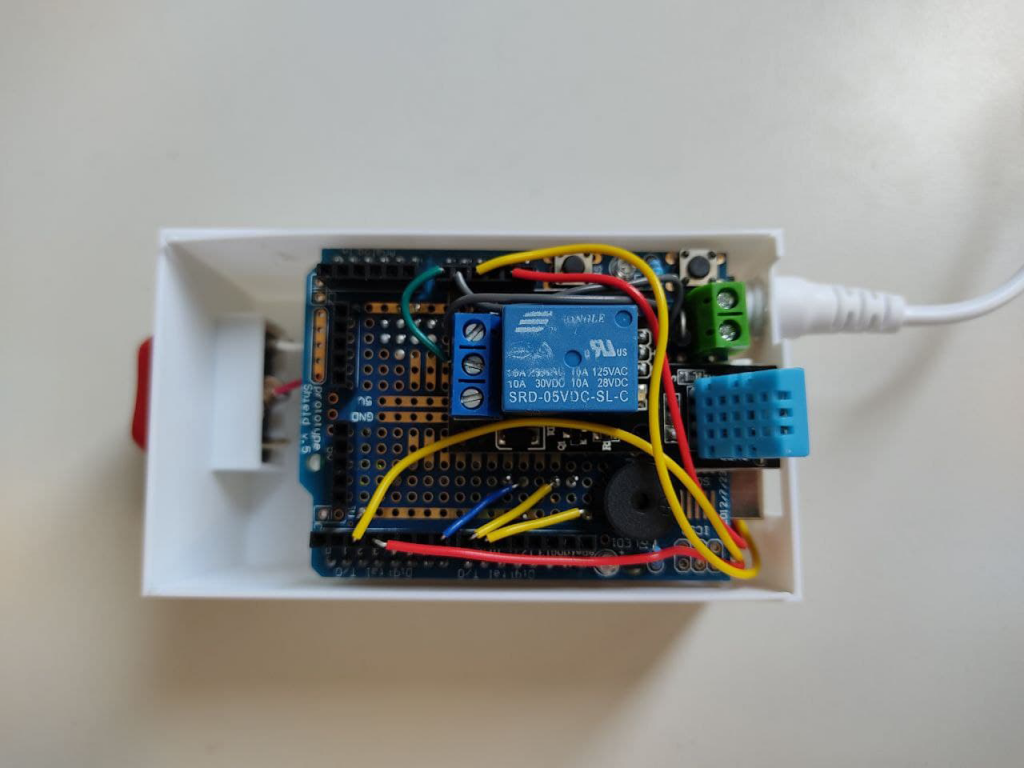
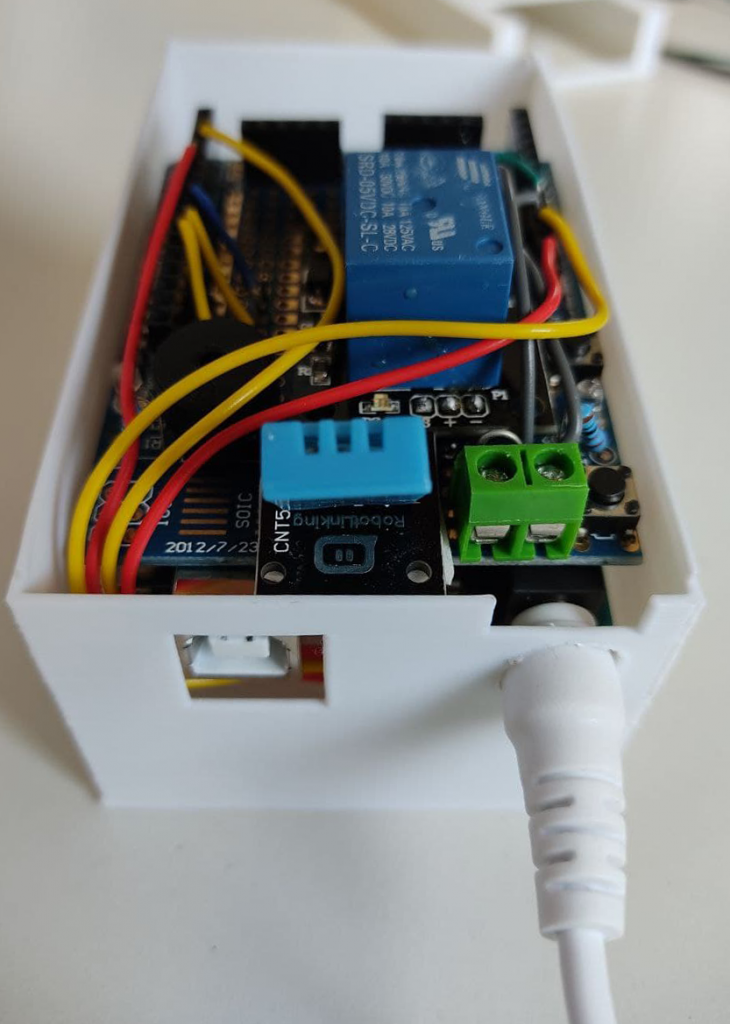
Finally, in order to protect the Arduino and the circuitry, we decided to print a simple case that contains the entire project. We use FreeCAD for the 3D project and CURA software for printing (printed with Ender3 3D printer). We decided to print it into 2 pieces in order to improve the inspection and the maintenance.
Final product
At the end, the final product is the following:

And once we insert it on our greenhouse, the bot writes the temperature and humidity

Thanks for reading and happy growth!

[…] In our company, we use the 3D printer several times to print the most varied things: we create and print custom cases for boards, joints for robotic parts, humanoid robot parts, gadgets, etc … For example, take a look at our article about an IoT application with a custom case: https://www.makarenalabs.com/nebul-iot-a-simple-embedded-smart-device-for-greenhouse/ […]