
Kria and videogames: Hi, I’m Krio!
Introduction
As we have seen in the last article it’s possible to create and compile a hybrid application on the FPGA system and Kria SOM and use it as a common web application.
At the end of the article there is an incipit about a videogame on FPGA. As weird as that may sound, but we created the first videogame from MakarenaLabs on Kria SOM.
It’s called Krio:“the virtual assistant of MuseBox”.
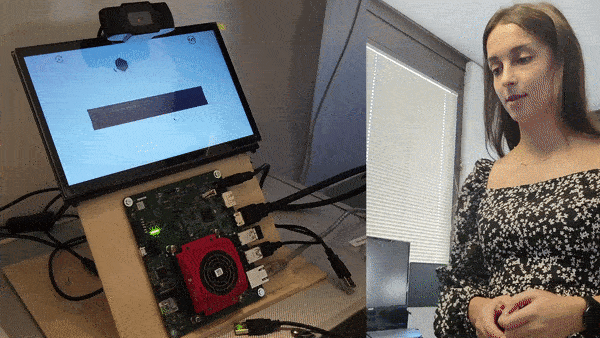
We have a special board with a high processing power and a little partition dedicated to rendering. It allows you to create demos with perfect performance staying to the rules of low poly ( hacking something about it).
How was all this possible? We will find out in the article step by step only using two things: patience and downtime for the builds.
Idea and concept with kria
The idea and concept of Krio was born to show everyone how MuseBox works. After creating the site and a series of videos about it, we decided to create a virtual pet. In this way people will be able to interact with the pet that explains our neural networks. Especially at the exhibitions in contact with the public.
What better idea than a talking pet? And why not on a Kria SOM?
To get all that working right we merge many aspects about our knowledge to create them.
First of all the graphic had to be low poly for the rendering restrictions. Low poly is simply a mesh with small numbers of polygons.
Secondly, the scene must be without shadows, illuminations and all that is superfluous for the final result.
Thirdly, a logical dialogue for communication between the user and the pet.
Eventually we need to create a videogame that will be fluid, intuitive, low poly, interactive and not boring at all.
Just to be safe we have adopted a retro game style that merges all of the specifics mentioned above.

Part 1: Blender
To create Krio meshes, textures and animations we have used Blender, the free and open source 3D creation suite.
Krio mesh is composed of an Ico Sphere, a spherical mesh that consists of equally sized triangles, and very low poly hands created from extruded cubes.
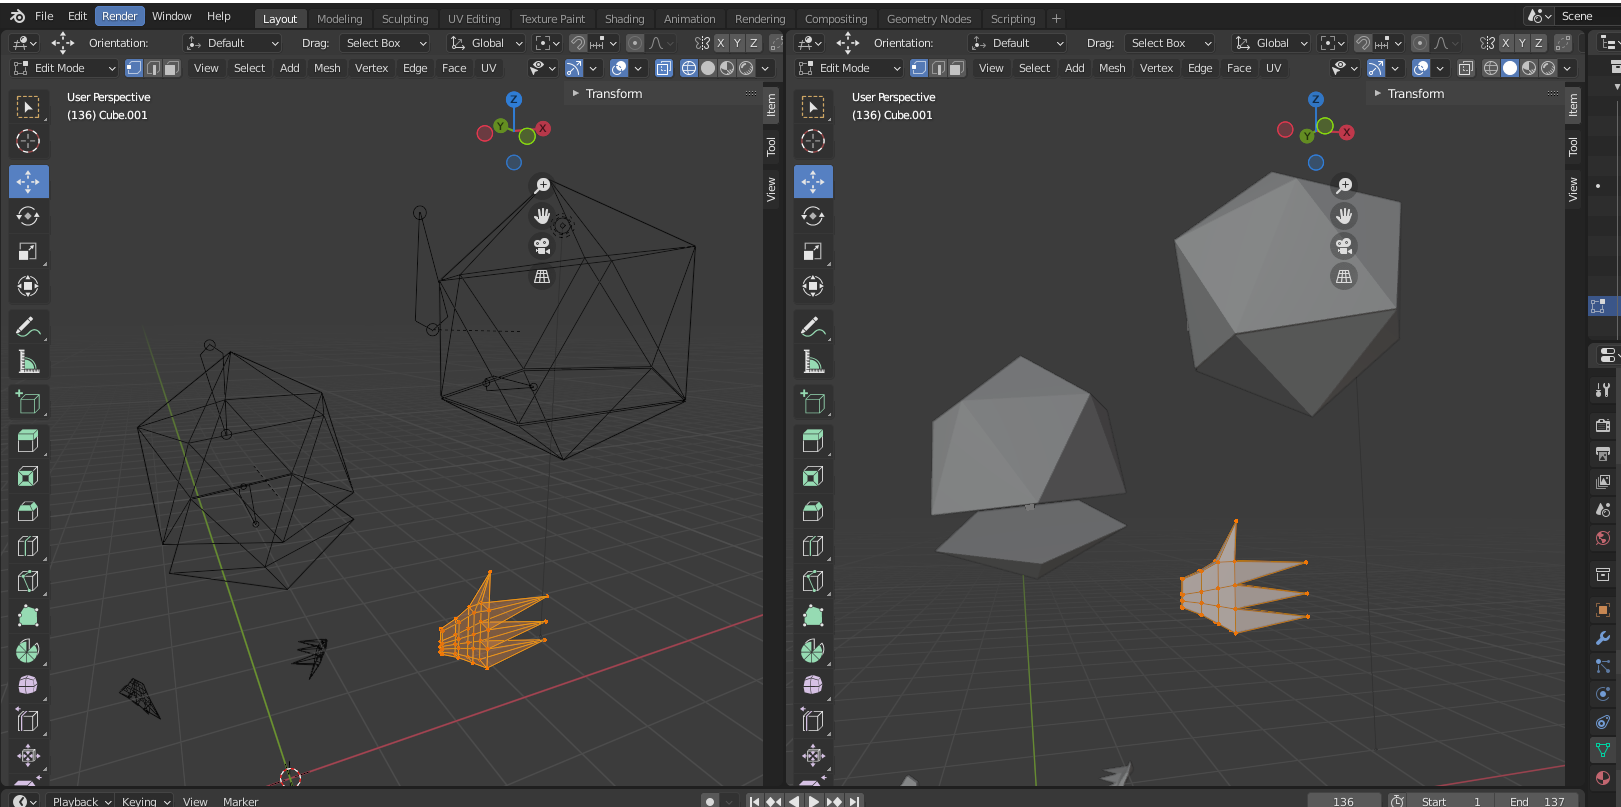
Afterwards, through the use of Photoshop, we have elaborated the UV texture (created with model unwrapping) in an accurate way.
The end of the work in Blender was concluded by animation creations: head of Krio and hands of Krio in a loop version.
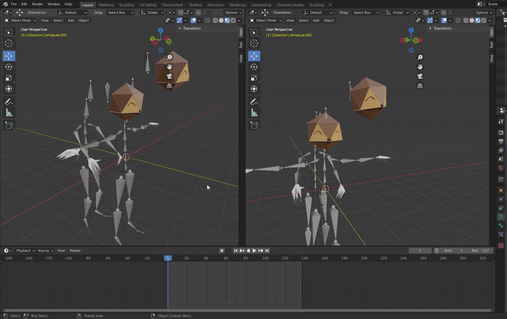
Part 2: unity
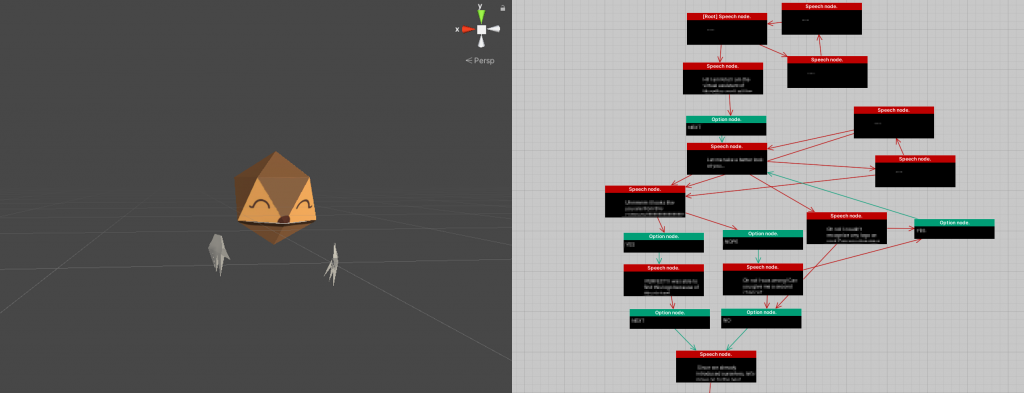
The most time consuming part was creating the scene in Unity3D and the connections with Kria SOM by Websocket, i. e. the actual game.
After setting the environment and the animations, we builded the game logic: a “simple” flow diagram noobs proof. This flow must starts the request to Krio regarding the choice of user and it synchronizes the data received from the game. In order to not saturate the Kria GPU we have eliminated all unnecessary graphic aspects, i.e.: global illumination, shadows etc…
Part 3: architecture with kria
The architecture is composed in this way:
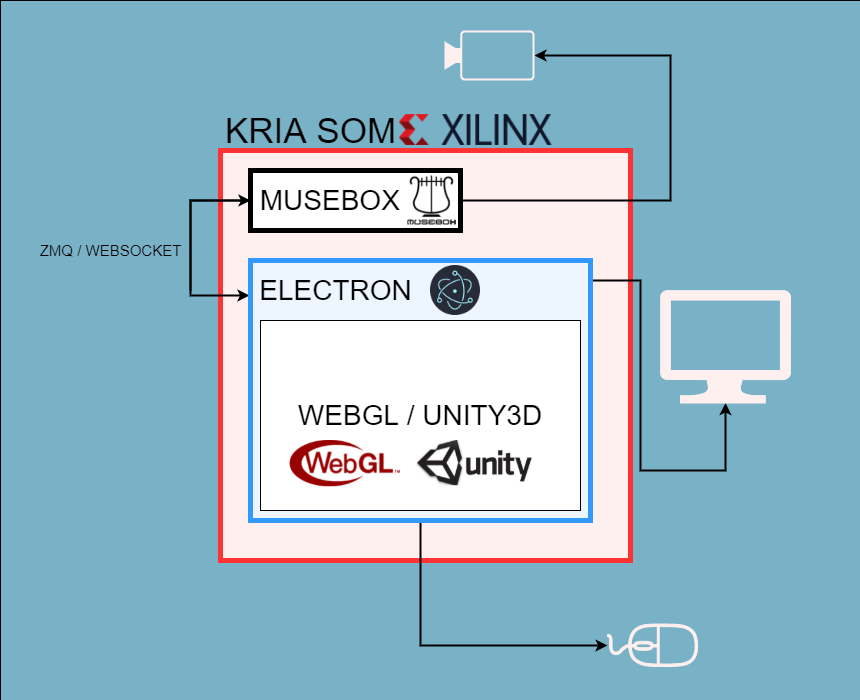
In this new MuseBox frontend the base architecture is not very complex. Running Electron on Kria SOM it was possible to use Chromium, that is a free and open-source web browser developed and maintained by Google, usually used on Linux OS.
With Chromium it was possible to run a WebGL application, in our case Krio Game, that was builded for the WebGL platform without lost performances.
With this structure it was possible to connect MuseBox with the application through Websocket. Establishing a connection between Krio and MuseBox it is possible to send commands from Krio to MuseBox, but what is its purpouse?
Part 4: Hi, i'm krio!

This demo guides the user to use our neural networks. First of all, Krio starts to speak when someone is watching it through a camera. It sends the request to MuseBox to start the first Neural Network via Websocket. This is how attention detection works.
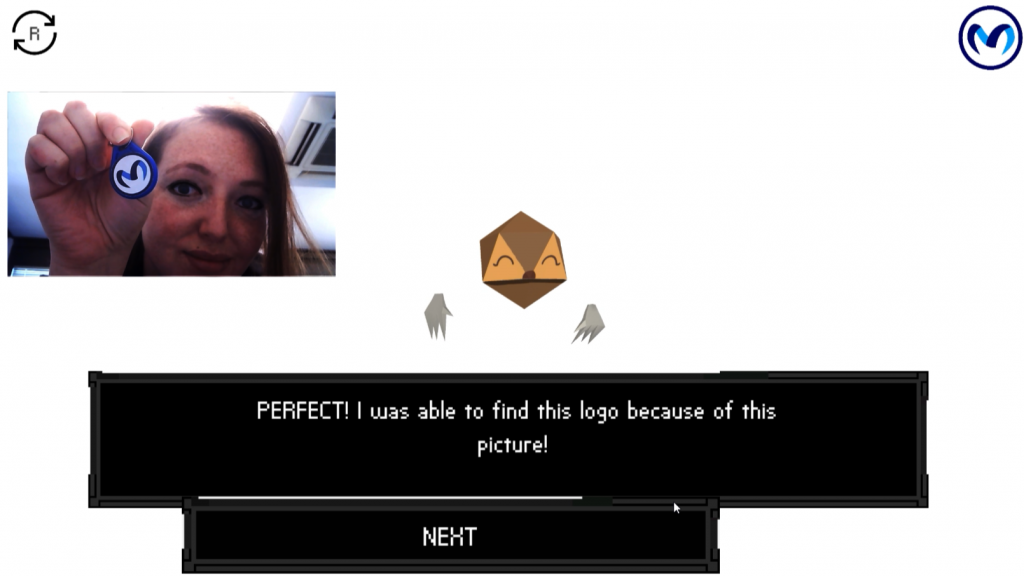
Afterwards Krio tries to recognize any logos on the person in front of it. In this case all of the frames caught in camera are elaborated in MuseBox to identify a logo or any company name in the accessories (included clothes) worn.
This is how logo recognition works.
Krio prints the frame on screen showing the exact image where the logo was recognised.
The third demo consists of following the user’s head movement on the screen. In this case MuseBox sends the landmarking points to Krio. It moves in a proportional way in Krio’s world. It passes through 2D points from a frame, to 3D points in its world, but in a screen view (also 2D points)… Yes, it’s a little bit crazy, we know.
This is how face landmarking works.
The last demo in Krio (for now) is face decoration. Through frames that contains a face, Krio “draws” something in it. In our case, Krio shows a consecutive frame with your face with mustache! It’s funny!
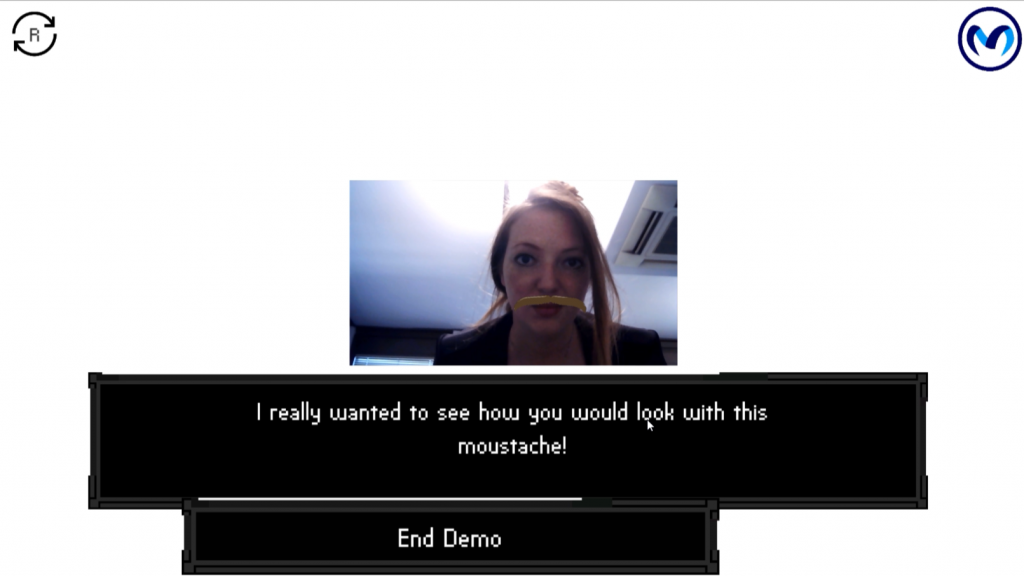
At the end of the demo, Krio greets all and restarts the entire demo for a new curious person.
conclusion
Through this kind of demo it is possible to think how powerful is creating an HMI solution based on a Hybrid Application. After all, we created a new little console capable of elaborate data and calculators, but with a graphic personalization adaptable to a variety of uses. See you soon for the next demo!
