PYNQ on Corazon-AI: AI applications for all
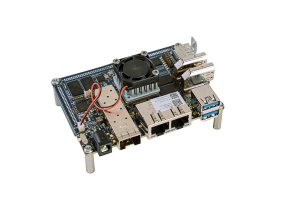
Corazon-AI is an embedded EdgeAI platform from iWave company with a Zynq Ultrascale+ MPSoC device. It supports Vitis AI and has a compact form factor (100mm x 72mm). This platform is coupled with multiple high-speed connectivity options, such as:
- Dual GbE,
- Wi-Fi,
- BT 5.0,
- 4G network support via an M.2 expansion slot,
- Dual CAN,
- USB 3.0.
With the provision to connect 8 IP cameras, Corazon-AI becomes an ideal fit for EdgeAI Gateways bringing intelligence to the edge.
You can find every detail following this link.
Due to the fact that supports completely the Vitis AI framework for Machine Learning application, it is a perfect candidate for a product-ready application. Finally, this board is certification-ready (e.g. for CE certification), also for industrial-grade, shall we continue?
First of all, we need to create a custom board template directory, that usually is placed in the PYNQ project root in the directory “custom_boards” (if it is not present, simply create it). We will name it “CorazonAI”.
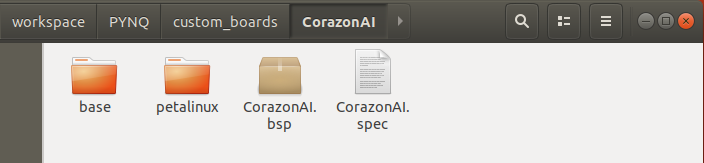
If you see, there are some specific files:
- CorazonAI.spec: it describes the structure of the project (will go deeper on it soon)
- CorazonAI.bsp: the generated bsp file from a petalinux build
- petalinux: a local petalinux project
- base: it contains the base bitstream of PYNQ, but is not interesting now, we can assume that is the same as ZCU104 (we will not use it, so it is not important)
The CorazonAI.spec file contains those lines:
ARCH_CorazonAI := aarch64
BSP_CorazonAI := CorazonAI.bsp
BITSTREAM_CorazonAI := base/base.bit
STAGE4_PACKAGES_CorazonAI := pynq ethernet
If you notice, every line reports the “_CorazonAI” string, which might be the same as the project name (in our case “CorazonAI”).
The first line represents the architecture of the board (arm/aarch64), the second line represents the name of the bsp that will be used for the project, the third line represents the file name of the “base” bitstream (but is not useful for our purposes) and the last line represents the additional steps for the last stage of the building of PYNQ (if you need to add additional packages, you can specify them on this line).
So, after the definition of the “spec” file, let’s create a petalinux project:
petalinux-create -t project -n petalinux --template zynqMP
cd petalinux
petalinux-config --get-hw-description ../top_mod.xsa # iWave provide to us the xsa file with this name
petalinux-build
petalinux-package --bsp -p . --output ../CorazonAI.bsp
After some minutes, you will obtain the BSP file in the parent directory.
Now we are ready to build the SD Card image of PYNQ! So, go to the “sdcard” directory of your PYNQ local repository and run this command:
make all BOARDDIR=<absolute path of local PYNQ directory>/PYNQ/custom_boards BOARDS="CorazonAI"
After an hour or less, you will obtain the SD Card in the “output” directory. You can flash on an SD Card with Balena Etcher software as every SD Card image of PYNQ.
Now we are ready to test a simple application (sum between 2 arrays of 256 integers) on the PYNQ image.
So, connect with the browser to the Jupyter Notebook manager of the Corazon-AI and you can test it as follow:
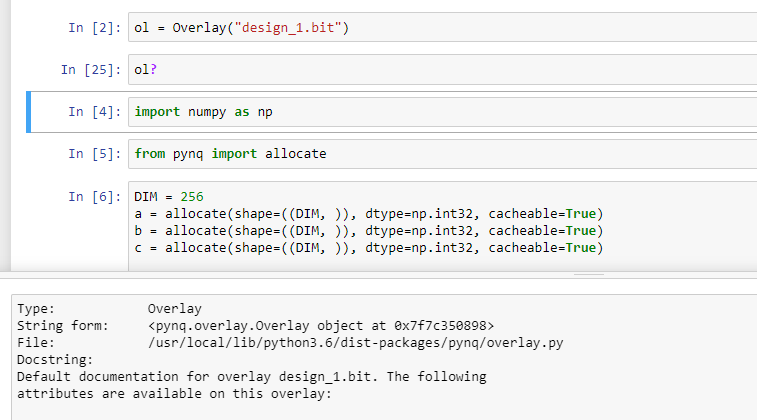
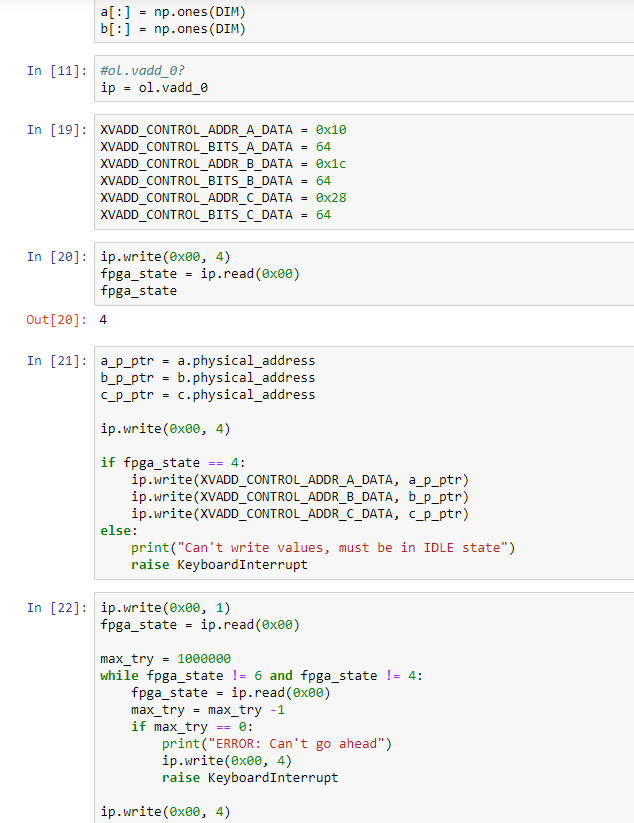
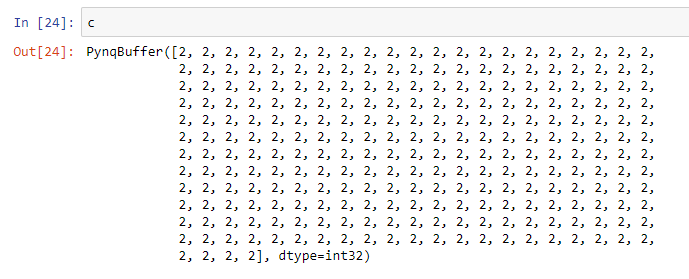
ok, we can say that PYNQ works on Corazon-AI!
You can download the complete image from this link:
https://s3.eu-central-1.wasabisys.com/pynq-images/CORAZON_AI_PYNQ.zip

[…] This article shows how to create a PYNQ-DPU application on CorazonAI with the acceleration of the whole AI pipeline flow for video analytics . Specifically this article is a follow-up of the previous article on CorazonAI which can be found here: https://www.makarenalabs.com/pynq-on-corazon-ai-ai-applications-for-all/ […]