PABLO: How to create a custom Robot using AMD technologies
Introduction
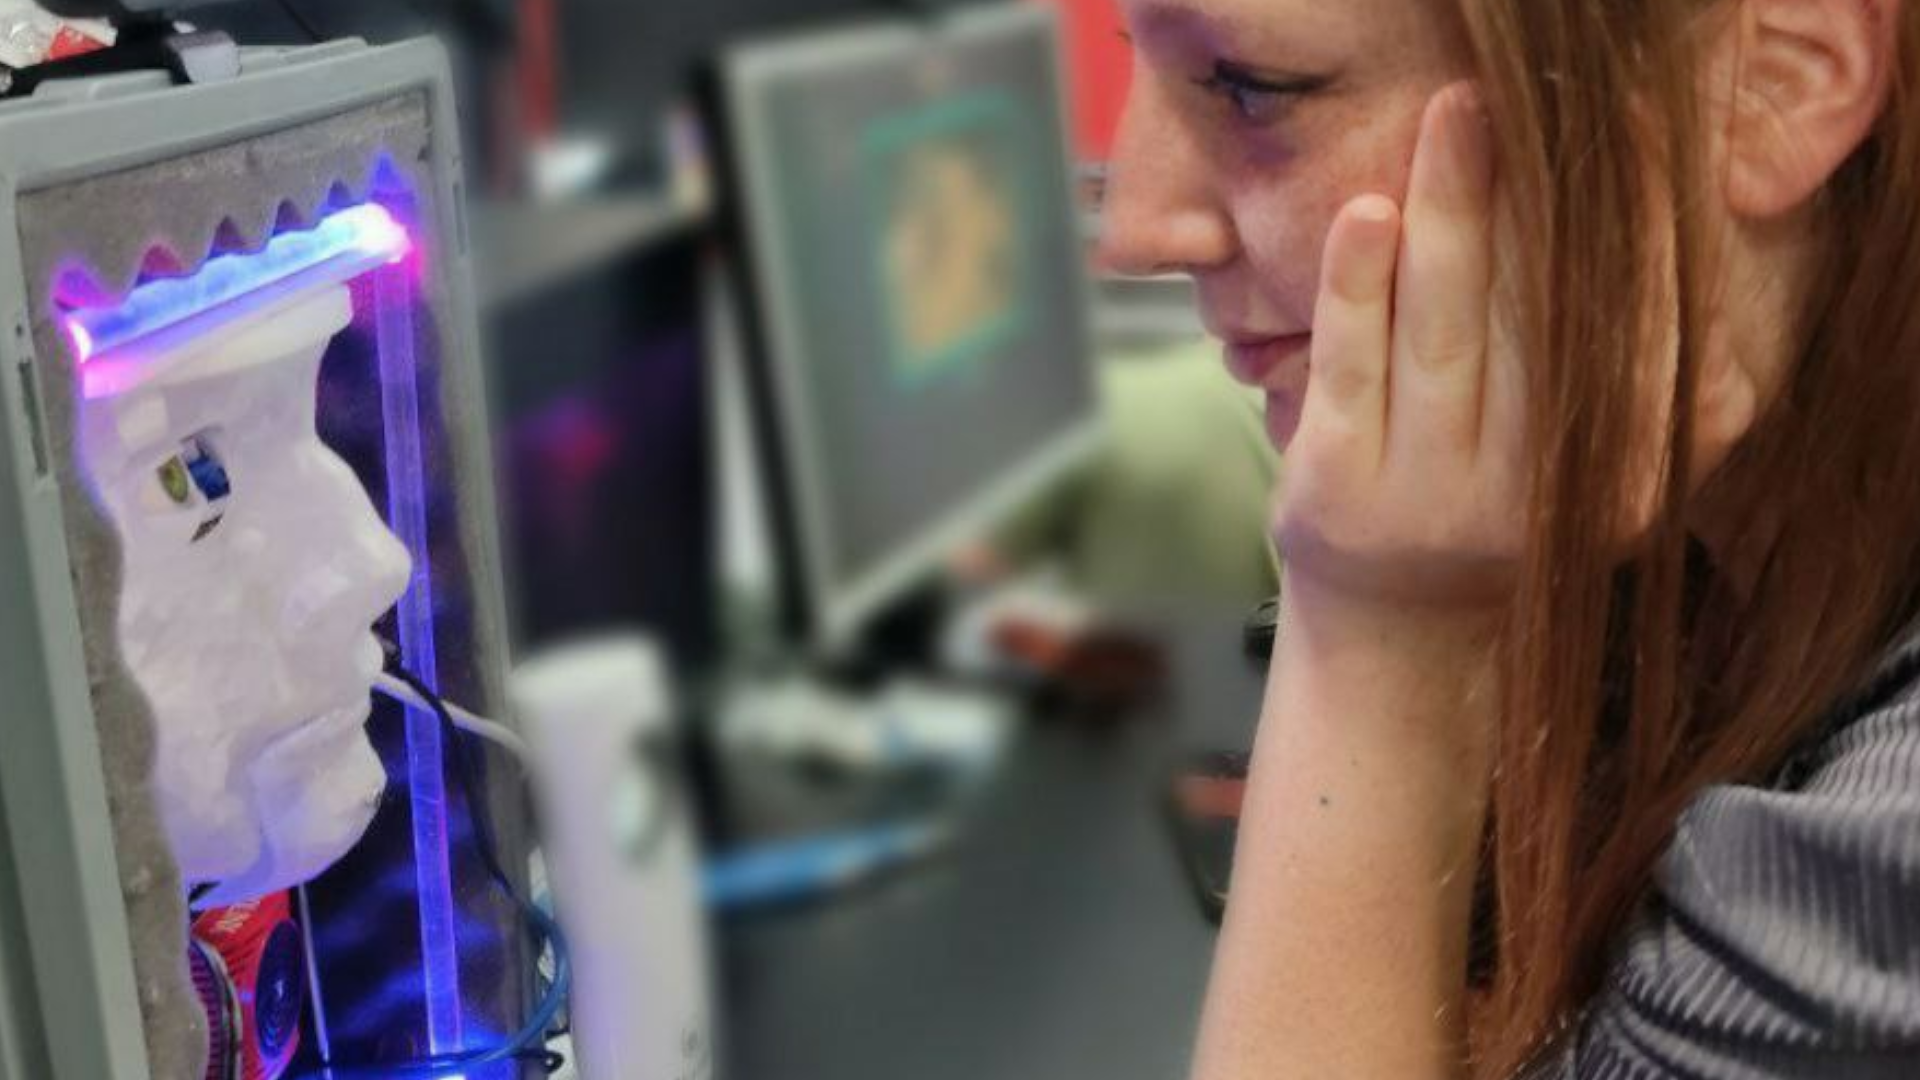
The topic of this article we are going to talk about the new baby born in MakarenaLabs, Pablo, a custom-made robot which is able to recognize and detect people and objects in the surrounding environment.
In short, the aim of Pablo is to showcase how to construct a robotic system from scratch by using MakarenaLabs MuseBox, IP libraries and AMD’s (former Xilinx) FPGAs.
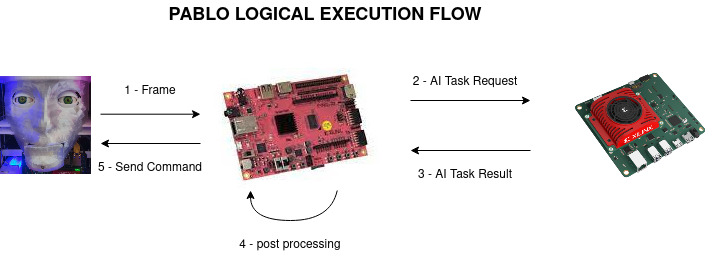
In conclusion of the article we will show the complete pipeline of execution of Pablo, with respect to an application of smart security.
The brain of Pablo
Before entering into the details of the construction of the robot, we need to detail what tasks Pablo has to perform:
- Understanding whether some people are in its field of view
- Distinguish and track their faces
- Recognize if a person is listed in the white list
- In case the person is in the white list, communicate it using text-to-speech on the audio synthesizer
- In case the person in not in the white, communicate it using text-to-speech on the audio synthesizer
First, to perform these tasks, MakarenaLabs uses its own product MuseBox ( https://musebox.it/ ), out of which MakarenaLabs extracts the AI models for Face Detection, Face Recognition and People Tracking.
Secondly to compute the audio synthesis task MakarenaLabs created as a custom hardware, with a custom IP hierarchy created from its own libraries plus the LogiCORE IPs available in Vivado.
Now that we know what the pieces are, how can we put them altogether to create a custom solution?
The physical components
In the previous chapter we mentioned the fact that Pablo is a custom-made robot. Som it is necessary to detail the main physical components of Pablo, which are:
- 3D printed Face
- Resin printed Eyes
- 3D printed joints and links to move the eyes
- TUL Pynq Z2 (based on AMD Zynq 7000 SoC)
- AMD’s KRIA KV260 (based on AMD Zynq US+)
Above all, we must specificy that the components that are 3D printed or Resin printed, are created from MakarenaLabs by upgrading some available community projects (subsequently this underline the importance of Open Source!). As a consequence, the next articles are going to cover how to create such custom printed projects.
The logical components
As the physical components also include two boards, it is necessary to detail the workload distribution between the two available boards.
Therefore the Kria KV260 is responsible for running the MuseBox’s AI tasks:
- Face Detection
- Face Recognition
- People Detection
- People Tracking
To sum up, the overall management of the AI tasks is done via a publish/subscribe method, which is embedded with a pre-defined data model in the MuseBox product. Moreover, MuseBox allows the users to create their own AI applications (or using the existing ones) with very little effort, as it manages all the problems of scheduling and task management (which are generally quite problematic!).
Finally, the Pynq Z2 is responsible for:
- Managing the audio synthesizer
- Managing the 8 motors which control the eyes movement and the mouth
- Creating request and deserializing the results obtained from the MuseBox applications
Conclusion
To conclude this article we invite all the the readers to participate at the ISE Trade Show in Barcelona (10 – 13 May, 2022) where they can meet Pablo, MuseBox and AMD’s Technologies in the AMD stand, where MakarenaLabs is invited as a guest. We look forward to meet you!
Enjoy your acceleration
